If you’ve ever had puddles forming in your yard after a rainstorm, you know how frustrating poor drainage can be. I’ve dealt with soggy spots and water pooling around my garden, which made me realize how vital proper drainage is for a healthy, functional landscape.
In this guide, I’ll walk you through the steps I took to improve the drainage in my yard, from simple fixes to more involved solutions, so you can keep your yard dry and vibrant, too.
Step-by-Step Guide to Improve Landscape Drainage
1. Why Landscape Drainage Matters
Poor yard drainage can lead to serious issues such as foundation damage, soil erosion, basement flooding, and the growth of mold and mildew. These problems reduce property value and lead to expensive repairs. Improving drainage is not just about removing water—it’s about reshaping how water moves through your land. A well-drained yard protects your home and enhances your outdoor space’s usability and sustainability.
When water does not drain well, it can make your basement damp. It can also lead to mold. That’s why yard erosion control around foundations is important. It helps keep water away from your home and stops damage early.
2. Assessing Drainage Problems in Your Yard
Before making any changes, begin with a thorough site assessment. Walk around your yard after a heavy rain and look for:
- Standing water that lasts more than 24 hours.
- Soggy soil that doesn’t dry.
- Moss patches, a sign of poor sunlight and drainage.
- Runoff paths that create channels or carry mulch away.
Check if the water flows toward your home’s foundation or creates pools near walkways or patios. These are signs that action is needed. You can also perform a simple soil drainage test: dig a hole 12 inches deep and fill it with water. If it doesn’t drain within 24 hours, you have compacted or clay-heavy soil that needs better drainage.
3.Your Soil Type and Topography
Soil structure is one of the most important factors in drainage. Clay-heavy soils tend to retain water, while sandy soils drain too quickly. Most yards in Hanover, PA, sit on loamy-clay mixtures, which are prone to compaction but can be improved with the right grading and organic amendments.
Use the USDA Web Soil Survey (https://websoilsurvey.nrcs.usda.gov) to identify your property’s soil classification. For topographic mapping, you can consult local GIS tools provided by York County GIS Services (https://yorkcountypa.gov) to understand elevation slopes and water flow paths.
4. Identify Common Landscape Drainage Solutions
Here are effective systems and solutions to improve your yard’s drainage:
4.1 Grading and Sloping
Grading adjusts the slope of your yard to direct water away from structures. For homes in Hanover, the ideal slope is 2% away from the foundation, or roughly 1/4 inch per foot for the first 10 feet. Always check for zoning or permit regulations when moving soil near property lines.
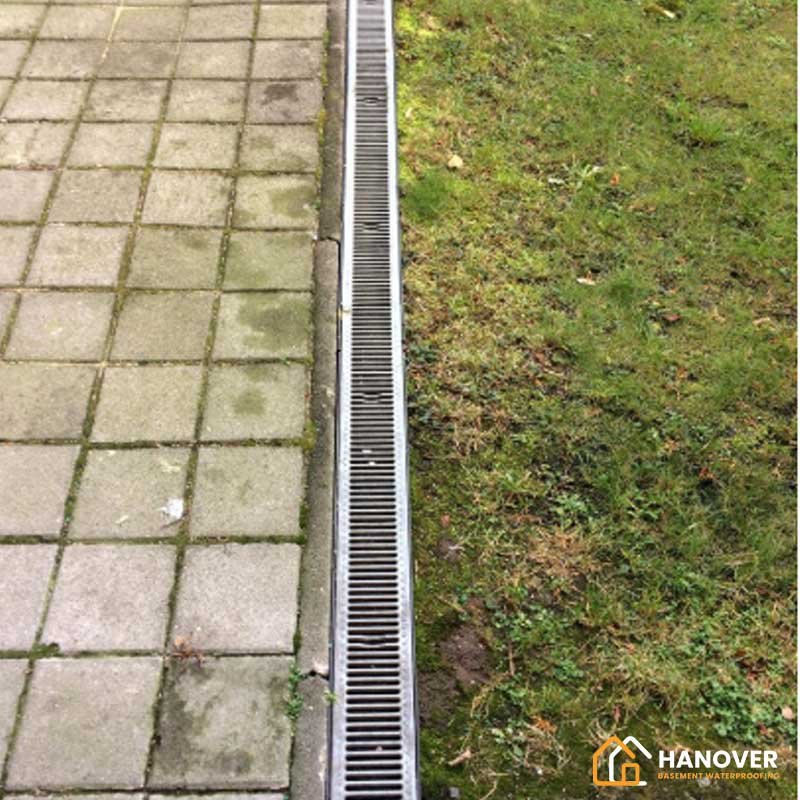
4.2 French Drains
A French drain is a trench filled with gravel and a perforated pipe that redirects water away from problem areas. It’s best for flat yards or areas with recurrent pooling. The trench typically runs 12–24 inches deep and should slope downward 1% or more toward a drainage outlet.
4.3 Dry Wells
Dry wells collect runoff and gradually release it into the ground. These are especially helpful in regions like Hanover where clay sublayers can hold water at surface levels. They are often used alongside gutter downspouts.
4.4 Swales
Grassy swales are shallow, vegetated channels that slow and absorb runoff. They blend into natural landscapes and serve both functional and aesthetic purposes. Swales work well in low-lying strips along driveways or sidewalks.
4.5 Downspout Extensions
Ensure gutter downspouts discharge water at least 5–10 feet away from your foundation. You can extend downspouts using flexible pipe or rigid PVC tubing directed toward a natural drainage zone or rain garden.
Water often builds up near the bottom of homes. A French drain to protect your basement from water intrusion moves water away from the house. This keeps your basement dry and safe.
5. Consider Local Regulations and Permits
Before making major changes, consult:
- Hanover Borough Building Department: For trenching, grading, or connecting to stormwater systems.
- York County Conservation District: If you’re installing rain gardens or affecting water runoff into municipal drains.
Check the Hanover Stormwater Ordinance for guidelines on impervious surface management, erosion control, and required setbacks from property lines.
6. Tools and Materials for Drainage Installation
To implement effective drainage, gather the right tools and choose materials based on your selected solution.
6.1 Tools for Yard Drainage Projects
- Spade shovel and trenching spade: For digging and shaping trenches.
- Level and string line: To measure slope and maintain grading accuracy.
- Wheelbarrow: For transporting gravel, soil, or compost.
- Utility knife and hand saw: For cutting landscape fabric and PVC.
- Tape measure and laser level: For checking depth and pitch.
- Drill with auger bit: If installing dry wells or perforated pipes in dense soil.
6.2 Recommended Materials
- Landscape fabric: Prevents soil from clogging drainage systems.
- Perforated PVC or corrugated pipe: Main component in French drains.
- Gravel or crushed stone: Acts as bedding and filtration medium.
- Topsoil and compost: Used for swale construction or restoring disturbed areas.
- Catch basins or dry well kits: To collect and disperse runoff.
7. Step-by-Step Installation Instructions
Each method has a unique installation process. Below is a structured guide for French drain installation, one of the most effective solutions for yard drainage.
7.1 French Drain Installation
Step 1: Plan the layout
- Mark areas where water collects.
- Determine a path for redirecting water to a lower point or discharge zone.
- Call 811 PA One Call (https://www.pa1call.org) before digging to locate underground utilities.
Step 2: Excavate the trench
- Dig a trench 12–24 inches deep and 8–12 inches wide.
- Slope the trench about 1 inch for every 8 feet of length (1% minimum grade).
Step 3: Lay fabric and base gravel
- Line the trench with landscape fabric, leaving extra on the sides to wrap over the top.
- Add 3–4 inches of drainage gravel at the bottom.
Step 4: Position the pipe
- Place the perforated pipe with holes facing downward.
- Use solid pipe at the outlet end if it drains to a basin or dry well.
Step 5: Cover and wrap
- Fill with gravel up to 2–3 inches below ground level.
- Wrap fabric over the gravel to block soil infiltration.
- Top off with soil or sod.
8. Seasonal Maintenance and Troubleshooting
Proper maintenance ensures the long-term effectiveness of your drainage system.
8.1 Spring and Fall Checks
- Inspect drains and outlets: Clear leaves, sediment, or root obstructions.
- Regrade problem areas: Heavy winter snow or spring rains may shift soil.
- Flush pipe systems: Run water through the pipe to check for clogs.
8.2 Warning Signs of System Failure
- Water returning to the surface.
- Visible sinkholes or collapsed trenches.
- Overflowing downspouts or broken connectors.
8.3 Long-Term Upkeep
- Replace crushed gravel every 5–7 years in heavily used systems.
- Check vegetation in swales; replace with native plants when needed.
- Re-seed or mulch any disturbed areas to prevent erosion.
After a big storm, you might see cracks near your patio or driveway. These cracks can let in water. If you notice hairline cracks in concrete walls, it’s smart to fix them fast before the problem grows.
9. Eco-Friendly Drainage Enhancements
Modern drainage doesn’t just manage water—it improves environmental sustainability and supports soil health, native plant growth, and stormwater management.
9.1 Rain Gardens
A rain garden is a shallow depression planted with native vegetation that captures runoff from roofs, driveways, and lawns. It slows water, filters pollutants, and allows it to soak into the ground.
- Ideal placement: 10+ feet from structures and in full/partial sun.
- Plant selection: Use deep-rooted native species like blue flag iris, Joe-Pye weed, and switchgrass that thrive in wet-dry cycles.
- Maintenance: Weed regularly and mulch annually.
9.2 Permeable Hardscapes
Replace traditional paving with permeable materials:
- Previous concrete, gravel, or interlocking pavers allow water to infiltrate.
- Ideal for walkways, driveways, or patios.
- Reduce impervious surface coverage to comply with Hanover Borough impervious surface limits (https://hanoverboroughpa.gov).
9.3 Green Infrastructure Solutions
Use bioswales, vegetated filter strips, or rainwater harvesting barrels to extend system efficiency and minimize runoff volume.
10. Design Integration and Landscape Aesthetics
Functional drainage systems can also enhance the visual design of your yard.
10.1 Hidden Drain Systems
Disguise French drains or dry wells under:
- Decorative gravel beds
- River rock channels
- Raised garden beds or mulched paths
If you already fixed your foundation, you still need to move water away. A dry well helps with this. It works well after foundation repair for settling issues and keeps new cracks from forming.
10.2 Swale Landscaping
Turn swales into focal features:
- Add stone borders, native plants, and low-voltage lighting.
- Use curved shapes to make them appear natural and integrated.
10.3 Edging and Borders
Install:
- Steel or plastic edging around gravel trenches
- Retaining borders for dry creek beds
- Low fencing near rain gardens to define zones
These features improve drainage control and curb appeal.
11. Budgeting and Cost Considerations
Effective drainage can be cost-efficient with proper planning.
11.1 Cost by Solution Type
| Drainage Method | Typical DIY Cost Range |
| Grading | $500 – $2,500 |
| French Drain | $1,000 – $2,000 |
| Dry Well | $300 – $1,200 |
| Rain Garden | $100 – $600 |
| Swale Construction | $400 – $1,500 |
11.2 Ways to Reduce Costs
- Use locally sourced materials from Hanover landscape supply stores.
- Reuse existing soil and mulch where possible.
- Apply for stormwater grants or credits through York County Conservation District (https://yorkccd.org).
12. Local Resources and Professional Help in Hanover, PA
If your drainage needs go beyond DIY, contact:
12.1 Government and Planning Agencies
- Hanover Borough Stormwater Office
- York County Planning Commission
- PA DEP (Department of Environmental Protection)
12.2 Local Landscaping Services
- Hanover Landscapes & Drainage Solutions
- J & J Lawn Service
- Hively Landscaping (York County)
Ask for:
- References for similar past drainage projects
- Proof of local permitting knowledge
- Warranty on materials and labor
Transforming Water Problems into Functional Design
A better yard drainage plan keeps your home safe. Local experts can help. They may suggest a structural inspection for foundation damage to find problems early and stop bigger repairs later.
With careful planning and the right combination of solutions—graded slopes, French drains, rain gardens, and smart landscaping—you can turn a wet yard into a resilient, functional, and beautiful outdoor space.
Identifying Drainage Problems in Your Yard

Common Signs of Poor Drainage
The signs were evident when I first started addressing drainage issues in my yard. One of the most common indicators of poor drainage is water pooling in certain areas after a rainstorm. This happened in a few spots in my yard, especially around the foundation. If you notice water sitting around your home’s base or near garden beds, that’s a red flag.
Another sign is uneven or soggy ground. I could feel soft, squishy spots when walking across my lawn, particularly after rainfall. This indicated that the water wasn’t draining properly and was collecting in the soil, making the ground overly saturated.
You might also notice mold or mildew growth in areas with poor drainage. Wet, stagnant water creates the perfect breeding ground for these issues. If you see discolored patches on your lawn or walls that seem constantly damp, it’s time to take action.
Finally, look out for erosion. Water not draining correctly can erode your soil, washing away parts of your yard. I started to see this near the edges of my flower beds. Erosion harms your landscaping and can lead to more significant foundation problems.
How to Inspect Your Yard for Drainage Issues
Inspecting your yard for drainage problems doesn’t require fancy equipment, just patience and careful observation. After a rainstorm, I started by walking around my yard to see where water was collecting. This gave me a clear picture of which areas needed attention.
I also checked around the foundation, looking for watermarks or discoloration on the walls. Water pooling here could be a sign that the gutters aren’t directing the water away correctly or that the ground around the foundation is too flat.
If you see soggy spots, it’s a good idea to dig a small hole to see how deep the water has penetrated the soil. This helped me identify where drainage wasn’t happening as expected. I also tested the slope of my yard by setting up a level on the ground—any areas that didn’t slope away from the foundation needed regrading.
Finally, look for places where water flows to check if there are natural paths where water could be diverted. Understanding your yard’s unique drainage patterns is crucial to fixing the issues.
Tools Needed to Assess Drainage
When inspecting your yard for drainage problems, you don’t need too many tools, but a few basics will help you do a thorough job. The first tool I used was a level. This helped me check the slope of my yard and see if water was moving in the right direction or pooling in low spots.
A shovel was also essential. I used it to dig small test holes in soggy areas to check the soil’s moisture level and determine how deep the water had soaked in. It helped me assess whether the problem was surface-level or deeper in the ground.
Another tool I found helpful was a garden hose. I set it up in certain yard areas to simulate rain and watched how the water moved across the ground. This gave me a clear visual of where water flowed, pooled, or did not drain correctly.
Finally, having a tape measure on hand helped me accurately measure distances and slopes, making it easier to plan for future improvements like regrading or trenching. These basic tools allowed me to assess my yard’s drainage precisely.
Conclusion
Improving landscape drainage is crucial for maintaining a healthy yard and protecting your home from water damage. You can effectively manage water and prevent flooding by following the steps outlined in this guide—regrading, installing French drains, and using gutter extensions. Regular inspection and maintenance are key to keeping your yard dry and your landscape thriving. You can ensure your yard remains in great shape year-round with a little effort.
FAQs
How much does it cost to improve landscape drainage?
The cost of improving landscape drainage can vary greatly depending on the extent of the problem and the solutions you choose. Simple fixes like regrading or using gutter extensions may cost a few hundred dollars. More complex solutions, such as installing French drains or dry wells, can range from $1,000 to $5,000 or more, depending on the size of your yard. Getting a few estimates from professionals to better understand what to expect for your specific needs is a good idea.
Can I fix drainage problems myself, or should I hire a professional?
You can fix some drainage problems, especially minor ones, or involve simple solutions like regrading or adding gutter extensions. However, hiring a professional might be the best option for more complex issues, such as installing French drains, drainage pipes, or dry wells. Professionals have the right tools, expertise, and experience to handle complex drainage problems safely and effectively.
What’s the best solution for a yard that stays wet always?
If your yard is consistently wet, it likely has poor drainage. The best solution often involves regrading to improve slope and installing French drains or dry wells to redirect water. Additionally, plants that thrive in wet conditions can help absorb excess moisture. If the problem persists, it may be worth consulting a professional to assess the situation and recommend a customized solution.
How long will it take to fix my yard’s drainage issues?
The time it takes to fix drainage issues depends on the size of your yard and the severity of the problem. Simple fixes like regrading or adding gutter extensions can be done in a day or two. More complex tasks, such as installing French drains or drainage pipes, may take a few days or even a week to complete. Plan for any weather delays or additional steps if unexpected issues arise.
Are there eco-friendly drainage solutions for my yard?
Yes, there are several eco-friendly drainage solutions! Swales, which are shallow ditches planted with grass, help direct water and prevent erosion. Additionally, installing permeable pavers or gravel paths allows water to flow through, reducing runoff. Planting water-loving plants like native ferns or cattails also helps absorb excess moisture while providing a habitat for wildlife. These options not only improve drainage but also promote sustainability in your yard.