Brick foundation walls are common in older and historic homes, especially in regions like Hanover, PA, where seasonal freeze-thaw cycles can lead to shifting soil and structural wear. Over time, these foundations may develop cracks, bulges, or signs of water intrusion. Addressing these issues promptly is essential to maintaining the structural integrity of the home and avoiding costly repairs.
This guide explains how to identify, assess, and begin repairing common forms of brick foundation damage, including what tools and materials are needed for the job. Whether you’re considering a DIY approach or planning to hire a professional, this resource is structured to help you make informed decisions.
Common Types of Brick Foundation Damage
Identifying the specific form of damage is the first step in effective repair. Different types of damage indicate different root causes, from minor aging to serious structural failure.
Vertical Cracks
Vertical cracks usually result from natural settling or drying shrinkage. They typically appear as straight lines extending upward from the base of the wall. While small cracks may be cosmetic, wider or expanding vertical lines may suggest shifting soil or foundation movement that needs evaluation.
Horizontal Cracks
Horizontal cracks are a more serious issue. These often indicate external pressure from soil, water buildup, or structural failure. In Hanover’s clay-heavy soil, water can exert lateral pressure against foundation walls, making these types of cracks a sign of potential collapse.
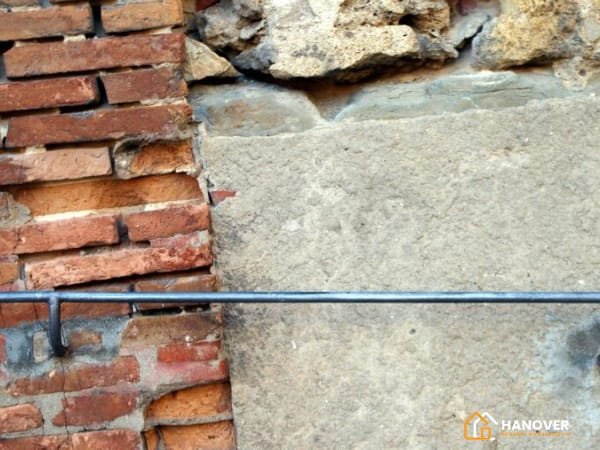
Stair-Step Cracks
Stair-step cracks follow the mortar lines between bricks in a step-like pattern. These are usually found in the corners of foundation walls and can be caused by uneven settling, moisture damage, or freeze-thaw cycles. If these cracks widen over time, they require immediate attention.
Bulging or Bowing Walls
When foundation walls bulge or bow inward, it usually means there is external hydrostatic pressure pushing against the structure. Left untreated, this can lead to wall failure or severe structural damage.
Signs of Brick Foundation Problems
In addition to visible damage, there are other indicators that your foundation may need attention:
- Doors or windows that stick or don’t close properly
- Water intrusion in the basement or crawlspace
- Efflorescence (white, chalky stains on brick surfaces)
- Cracked interior drywall near the foundation wall line
- Uneven floors above the basement or crawlspace
Homeowners in Hanover, PA should also be alert to seasonal shifts—spring thaw and heavy rains can rapidly worsen existing cracks.
Essential Tools and Materials for Repair
Proper repair begins with gathering the right materials. Each type of repair will require specific tools, but most foundational projects involve the following:
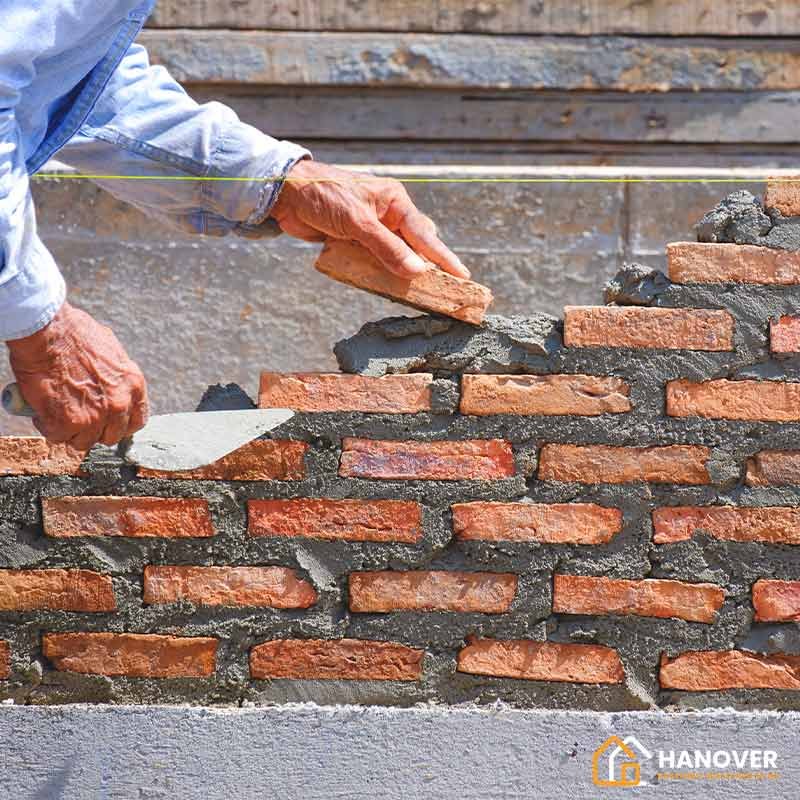
Trowel
A masonry trowel is used for applying and smoothing mortar between bricks. For repointing, a tuckpointing trowel may be used for greater precision.
Chisel and Hammer
Use a cold chisel and hammer to remove deteriorated or loose mortar. This step is crucial before applying new mortar.
Masonry Brush
A stiff masonry brush is required to clean out dust and debris from joints before repointing or sealing.
Mortar Mix
Choose a mortar mix appropriate for the type and age of your brick. Older homes often used lime-based mortar, while modern repairs may use a blend with Portland cement. For historic brickwork, refer to National Park Service guidelines to ensure compatibility.
Sealant or Waterproof Membrane
If water penetration is an issue, you’ll need a polyurethane sealant or a waterproofing membrane to protect the repaired area.
Level and Measuring Tape
For assessing wall straightness and crack spread, a carpenter’s level and tape measure are necessary.
Safety Equipment
Always use protective gloves, eye protection, and a dust mask when working with masonry materials.
When to Call a Professional
If your inspection reveals:
- Cracks wider than 1/4 inch
- Active water leaks
- Significant wall movement
- Foundation sinking or lifting
It is critical to consult a licensed structural engineer or contractor. In Hanover, PA, verify that professionals are certified and familiar with the local building codes and soil conditions.
You can check contractor licenses or file a report via Pennsylvania’s Office of Attorney General for home improvement protections.
Step-by-Step Repair Methods by Damage Type
Once the damage type has been identified and tools gathered, proceed with a repair strategy appropriate for your specific issue. Below are detailed methods tailored to the most common types of brick foundation damage found in homes across Hanover, PA and similar regions.
Repairing Vertical Cracks
Vertical cracks are often minor but should still be sealed to prevent water intrusion and expansion.
Steps:
- Clean the crack thoroughly using a brush and compressed air to remove dust and debris.
- Insert backer rod into deeper cracks to prevent excessive mortar usage.
- Apply hydraulic cement or polyurethane-based sealant to fill the crack.
- Smooth and seal the surface with a trowel, feathering the edges.
- Allow curing as per manufacturer instructions.
Hydraulic cement expands slightly as it sets, making it ideal for blocking small water pathways in foundation walls.
Repairing Horizontal Cracks
Horizontal cracks usually indicate structural stress. Professional consultation is strongly advised, but in minor cases, reinforcement and sealing may suffice.
Steps:
- Install carbon fiber straps or steel braces across the interior wall for added support.
- Epoxy-inject the crack using a low-pressure injection system to seal from within.
- Waterproof the exterior wall if possible to reduce external pressure.
- Monitor for further movement using measurement tape or crack gauges.
Carbon fiber reinforcement is a minimally invasive solution often recommended in Pennsylvania’s older homes, where full wall replacement may not be viable.
Repairing Stair-Step Cracks
Stair-step cracks usually follow mortar joints and may require repointing along with structural patching.
Steps:
- Chisel out damaged mortar to a depth of at least ¾ inch using a hammer and chisel.
- Brush out dust and wet the joints lightly with water to aid bonding.
- Pack in new mortar using a pointing trowel. Match the color and consistency to existing mortar.
- Tool the joints once the mortar begins to set, ensuring a smooth, professional finish.
- Mist the repair lightly with water for 2–3 days to aid curing and prevent cracking.
Avoid using modern high-strength mortar on old soft brick, as it may cause spalling or premature brick failure. Test compatibility before proceeding.
Bulging or Bowing Wall Correction
If a wall is bulging inward, the damage is likely structural. Professional repair is typically required, but for small deformations, reinforcement systems may suffice.
Options:
- Install wall anchors or helical tiebacks to counter soil pressure.
- Use interior braces or steel I-beams for direct structural support.
- If displacement exceeds 2 inches, wall rebuilding may be necessary.
These systems often require permits, inspections, and exact calculations of lateral loads. Hiring a Hanover-licensed structural contractor is the safest route. Explore a full comparison of reinforcement systems in our foundation repair methods guide for Hanover homes.
Preventive Waterproofing for Brick Foundations
Water is one of the biggest threats to brick foundations. Preventive steps can minimize future repairs and reduce humidity, mold, and cracking in the basement or crawlspace.
Exterior Drainage Control
- Extend downspouts at least 5 feet from foundation walls.
- Grade soil so it slopes away from the house (minimum 6 inches over 10 feet).
- Use French drains or swales to divert water in heavy rainfall areas.
Exterior Sealing
- Apply masonry water repellents to exposed exterior foundation walls.
- Use elastomeric coatings for high-risk zones.
These products allow bricks to “breathe” while preventing water penetration, maintaining moisture balance.
Interior Waterproofing
- Seal interior walls with vapor barriers or cementitious coatings.
- Install a sump pump system in case of frequent groundwater intrusion.
See This Old House’s guide for product comparisons and installation basics.
Seasonal Foundation Maintenance Tips
Hanover’s cold winters and humid summers cause expansion and contraction in soil and masonry. Year-round care is vital.
Spring
- Inspect for new cracks after thaw.
- Check for water pooling or basement dampness.
Summer
- Ensure adequate ventilation in crawl spaces.
- Regrade soil and clean gutters.
Fall
- Clean out downspouts and extend drainage lines.
- Inspect for loose or crumbling mortar before freeze sets in.
Winter
- Avoid salt-based deicers near foundation walls.
- Monitor wall movement inside basements or crawlspaces.
Routine inspections in each season can help detect minor issues before they escalate into major structural concerns.
Cost Breakdown of Brick Foundation Repairs
Repairing a brick foundation can range from simple patching to full structural reinforcement. Costs vary depending on the severity of the damage, the materials used, and whether the job is done DIY or by a professional.
Minor Crack Sealing
- DIY: $50–$200 (materials only)
- Professional: $300–$800
- Includes sealants, hydraulic cement, and surface smoothing.
Repointing Mortar Joints
- DIY: $100–$300 per wall section
- Professional: $600–$2,500 depending on area and joint depth
- Repointing includes removing old mortar and applying a new, compatible mix.
Stair-Step Crack Repair
- DIY: $200–$500 (requires precise mortar matching)
- Professional: $1,000–$3,000
- May include exterior water mitigation and structural monitoring.
Bowing Wall Reinforcement
- Carbon Fiber Straps: $400–$800 per strap
- Steel Bracing: $1,500–$4,000 per wall section
- Wall Anchors: $2,000–$10,000 depending on the size of the wall
- These prices include hardware and professional labor.
Foundation Rebuilding or Replacement
- Cost Range: $20,000–$50,000+
- Reserved for cases of advanced structural failure or total collapse
- May involve excavation, rebuilding with CMU blocks, and permitting
Costs in Hanover, PA may be influenced by labor availability, material sourcing, and local building regulations. Always request at least three itemized estimates before selecting a contractor.
DIY vs. Professional Repair
Deciding whether to repair a foundation yourself or hire a contractor depends on several key factors:
When DIY Is Feasible
- Cracks are less than 1/8 to 1/4 inch wide
- Mortar joints are accessible and not load-bearing
- No signs of structural movement or water seepage
- You have proper tools, safety equipment, and mortar knowledge
When to Call a Professional
- Bowing, bulging, or leaning walls
- Repeated water intrusion or mold formation
- Cracks wider than 1/4 inch or growing
- Building code compliance needed for permits or insurance
Hiring a licensed foundation repair specialist in Hanover, PA ensures compliance with Pennsylvania’s Uniform Construction Code (UCC). Professionals can also conduct soil pressure assessments, which are crucial in areas prone to seasonal ground shifts.
If you’re seeing cracks or wall shifts, explore our foundation repair services in Hanover, PA for expert help
You can verify license status or complaints via the Pennsylvania Home Improvement Consumer Protection Act database.
Choosing a Contractor in Hanover, PA
When selecting a professional for your foundation project, keep these points in mind:
- Ask for local references from jobs completed within the last 12–18 months.
- Verify insurance and bonding credentials to cover any on-site damages.
- Request written warranties for materials and labor—at least 2 years preferred.
- Avoid “drive-by inspections” that offer vague assessments or push high-pressure sales tactics.
- Check for familiarity with Hanover’s clay-rich soil conditions and freeze-thaw weather impacts.
Companies familiar with regional challenges (like shrink-swell soil behavior) will be better equipped to recommend appropriate long-term solutions.
Brick Foundation Maintenance Checklist
Use this seasonal checklist to maintain your foundation and reduce the risk of costly repairs:
Annual Inspection
- Walk the perimeter and check for visible cracks or leaning
- Inspect interior basement walls and joists for signs of moisture
- Test doors and windows for sticking or misalignment
Water Management
- Ensure gutters and downspouts discharge at least 5 feet from the foundation
- Grade soil away from the house
- Clean downspouts twice a year—spring and fall
Ventilation
- Keep crawlspaces dry with vapor barriers
- Use a dehumidifier in the basement during summer months
Masonry Touch-Ups
- Repoint minor cracks or missing joints before winter
- Apply breathable sealants every 3–5 years to exposed brick
Final Thoughts
Brick foundation repair requires a combination of structural awareness, precision work, and long-term planning. While minor issues can be addressed with DIY tools and vigilance, structural or moisture-related problems should be resolved with professional help.
In Hanover, PA, local soil conditions, weather, and aging properties create specific challenges that call for regionally knowledgeable repair methods. Follow this guide, perform seasonal maintenance, and partner with qualified professionals when needed to preserve your home’s integrity and value.
For additional homeowner guidance, visit:
- U.S. Department of Housing and Urban Development – Home Maintenance Tips
National Trust for Historic Preservation – Brick Care